This tutorial focuses on making a manual controlled robot using a wired remote control. This robot can traverse on plain surface as well as as rough terrain.
You can see the robot in action in the video below:
Components required and steps:
1. bakelite sheet or metal chassis or wooden ply or Acrylic sheet
Depending on your requirement, how tough the robot you want, accordingly choose the material for chassis, Metal and bakelite sheet are tougher compared to Acrylic sheet and wooden ply. Wooden ply are the easiest to work on. Cut the Bakelite sheet into required dimension. While marking dimensions accommodate the width of tires. After that mark the holes on Bakelite sheet according to motor clamps and drill the holes.
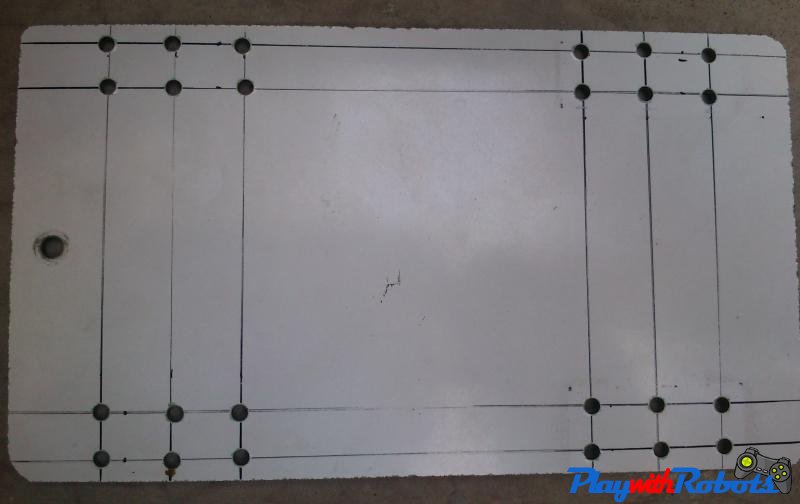
Bakelite sheet with drilled holes as per motor clamps dimensions
2. Motors
Depending on the speed you want selects the motors RPM. A 100RPM DC geared motor will be good enough for general purpose. In general for DC gear head motors lower the RPM higher is the torque.
3. Tires
4. Motors clamps

Motor tire and clamps
5. Fix the clamps to the bakelite sheet.
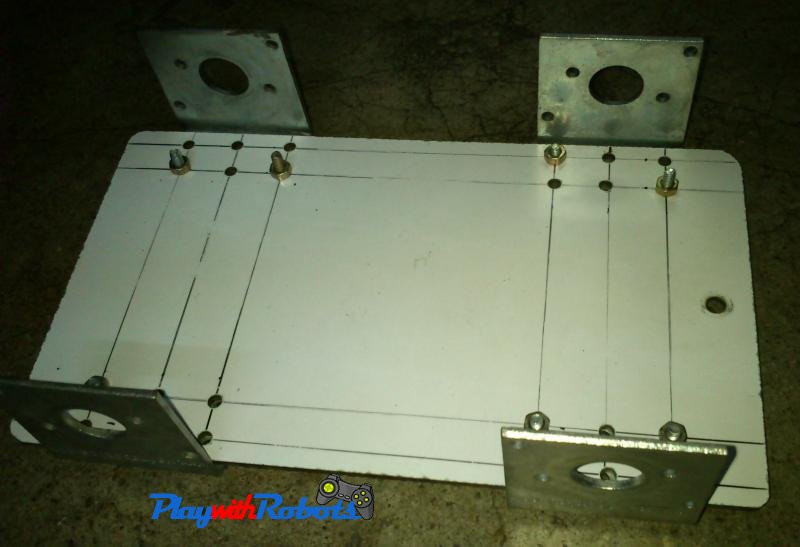
Clamps Fitting 1
Clamps Fitting 2
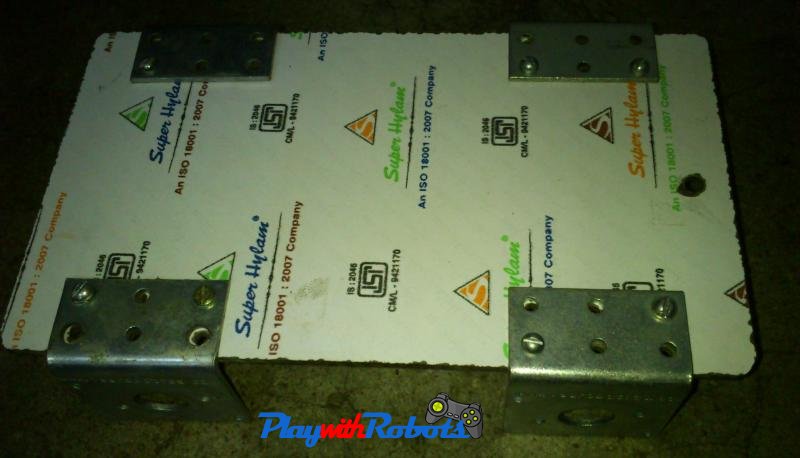
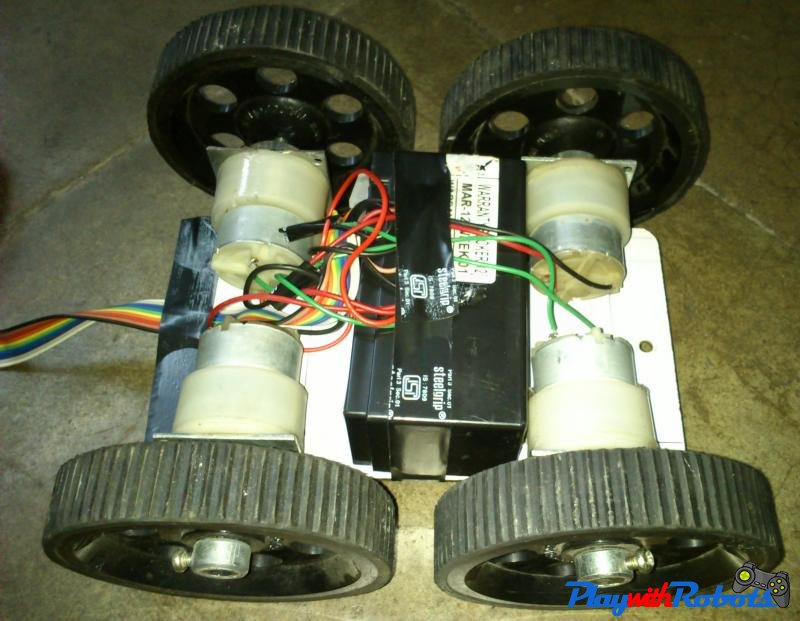
6. Fix the motors
Also connect two motors on same side in parallel. Double check that the two motors connected in parallel rotates in same direction when potential difference is applied on there connected points.

Motor fitting
7. Fix the tires
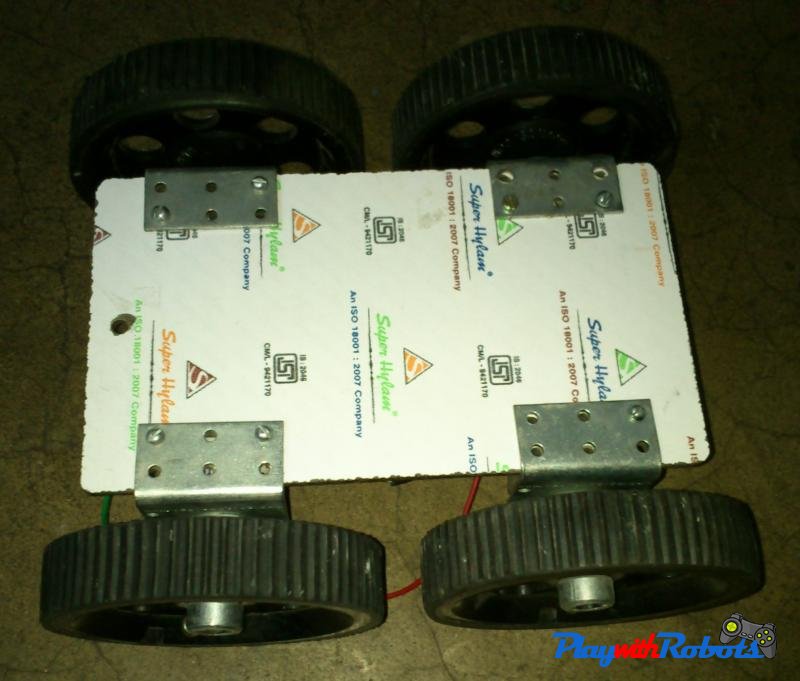
tires fitting
8. Place the battery on the robot and fix it tightly. I have used a 12V 1.3AH lead acid battery for this robot. Also make the connections of the robot with the remote control circuit.
Complete Bot 1
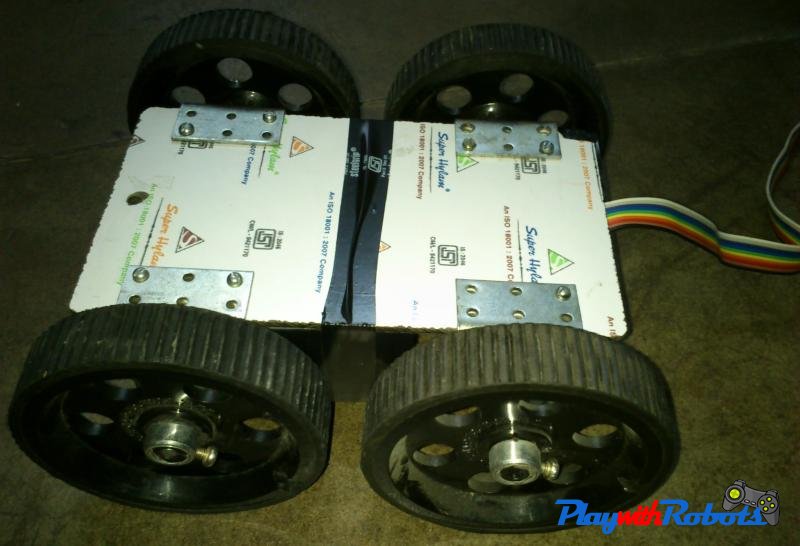
Complete Bot 2
Drive and enjoy!
Hope you liked the above tutorial. Subscribe to PlaywithRobots on facebook for more updates.
More on PlaywithRobots
avr-tutorials
- Introduction to AVR microcontrollers
- Basic hardware and software required for AVR
- AVR fuse bits
- Input/Output Concept